Tag: Leaderboards

All Riddles Lies Of P Solutions And Puzzle...
Navigating the dark world of Lies of P requires sharp instincts, strong combat skills, and an observant mind. Throughout the city of Krat, players encounter ringing public telephones operated by Arlecchino, the enigmatic King of Riddles. Answering these calls correctly rewards players with Trinity Keys, which unlock hidden sanctums packed with valuable loot and upgrades. Tracking down every phone location and deciphering the answers ensures your character gets the best edge possible in this challenging adventure.
Early Chapter Phone Locations and Solutions
The first riddle encounter occurs in Chapter II near the Krat City Hall Courtyard Stargazer. Before crossing the bridge toward the factory, turn down a side passage to find the ringing phone. The riddle describes a creature that walks on four legs in the morning, two at noon, and three at night, which is solved by choosing Human.
In Chapter V, players can locate the second ringing telephone near the central courtyard in the Malum District. Head past the Red Lobster Inn and up a ladder near the rooftop area to reach it. When asked what stands tall when young and short when old, select Candle to claim your second key.
Mid Game Riddles and Environmental Puzzles
Reaching Chapter VII brings players to the Grand Exhibition Gallery, where the third phone resides in a hallway near a blade-wielding robot encounter. Arlecchino asks what cannot be used until it is broken, which has the simple answer of Egg. Unlike previous encounters, solving this phone call directs you to a nearby statue puzzle where you must rotate a statue to reveal the actual Trinity Key.
Continuing into Chapter IX, the fourth telephone can be found shortly after leaving the Krat Central Station Street Stargazer. Follow the main path through the alcove and look left at the fork to hear the ringing receiver. The correct solution to this riddle about the blue flower bearing fruit on man is Ergo.
The Final Riddle Encounter and Trinity Sanctum Rewards
The fifth and final telephone is located in Chapter X along a cliff overlooking the boss arena at the Relic of Trismegistus Entrance. Rather than a traditional riddle, Arlecchino asks a moral question regarding whether Geppetto's puppet is a killer. Answering either choice yields Arlecchino's Surprise Box, which can be opened in your inventory to acquire the final Trinity Key.
Using these keys at various Trinity Doors scattered across Krat unlocks exclusive cosmetic outfits, rare defensive converters, and essential Quartz upgrades. Taking the time to answer every call grants major advantages that make surviving late-game boss fights much easier.
Nintendo Switch Vs Wii U Features Performance And...
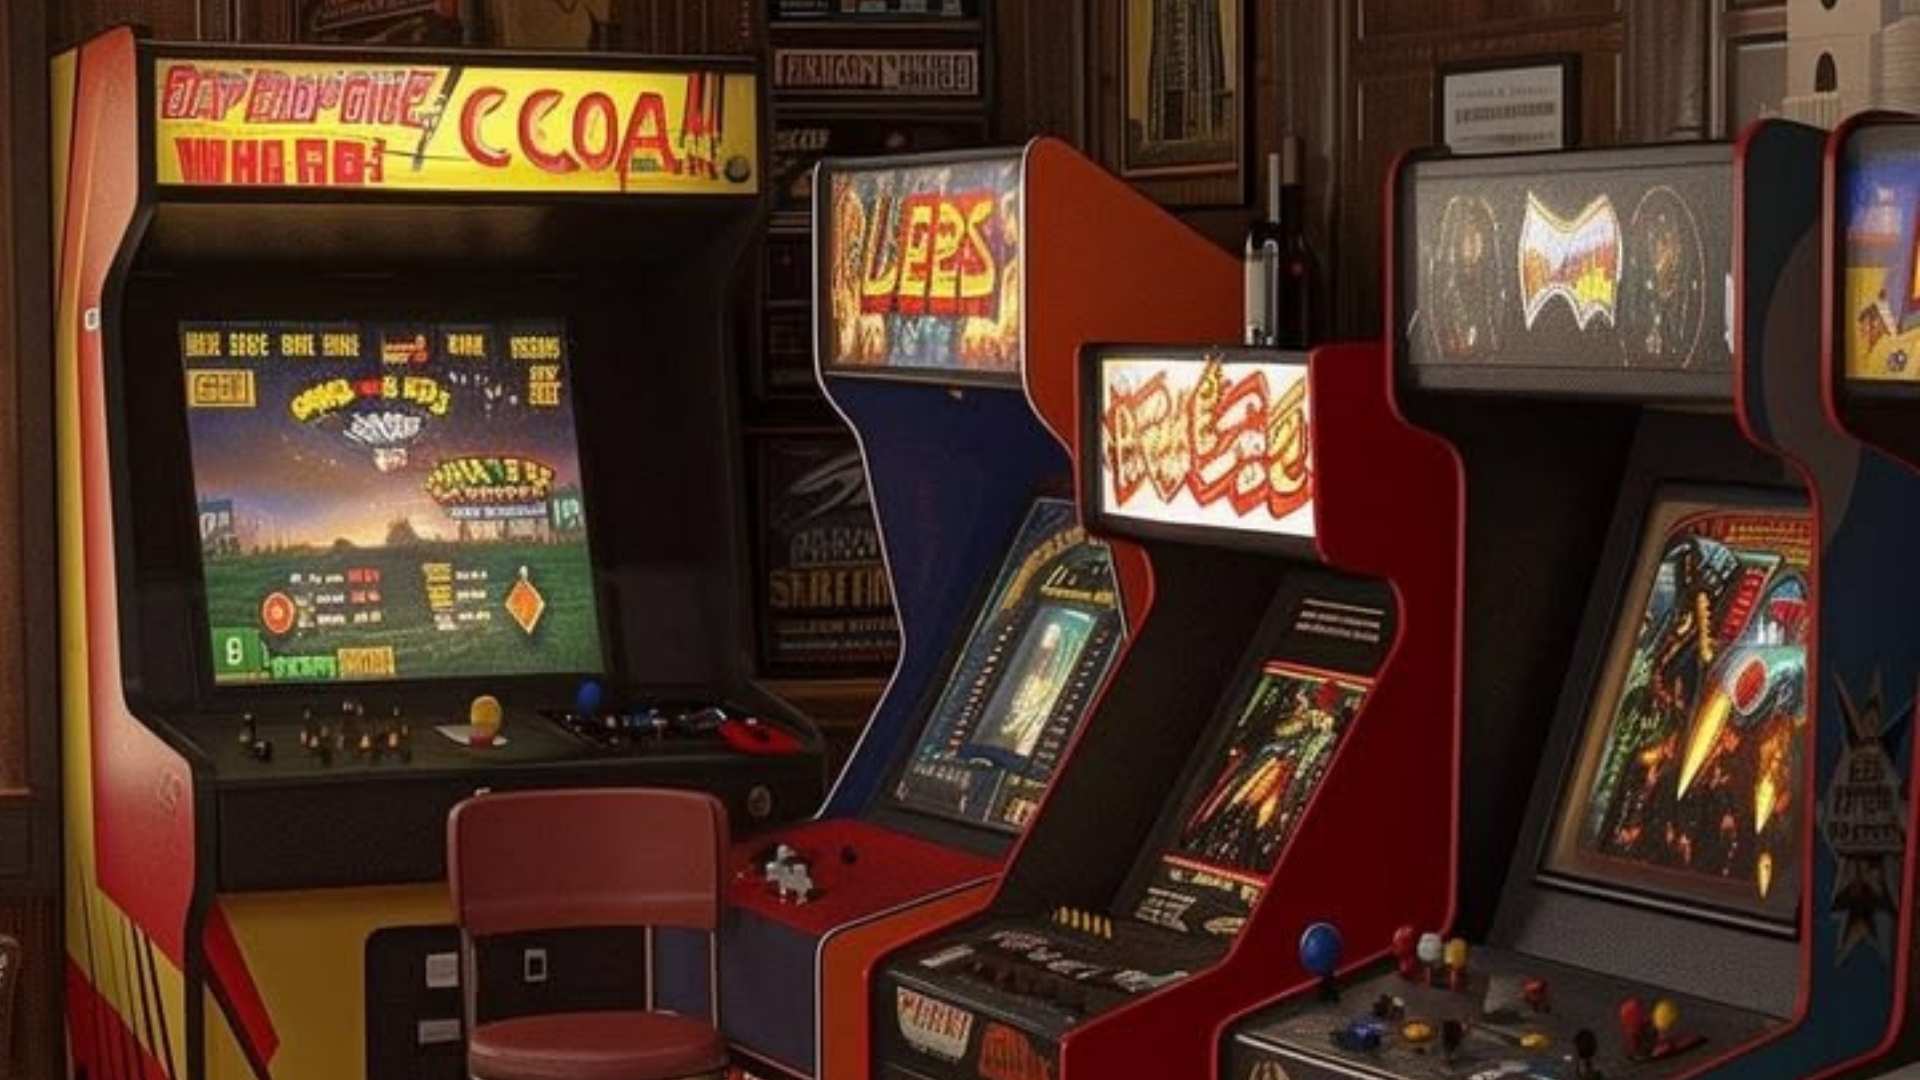
Comparing the Nintendo Switch and the Wii U reveals how Nintendo refined its approach to hybrid gaming across two distinct console generations. While the Wii U introduced the concept of off-TV play using a dual-screen setup, the Nintendo Switch perfected true portability by integrating the console hardware directly into the tablet. Understanding the core differences between their hardware capabilities, feature sets, and software ecosystems highlights why these systems achieved vastly different commercial outcomes.
Hardware Features and Design Innovation
The Wii U relied on a central console unit that streamed gameplay to a dedicated GamePad controller with a tethered wireless connection. This setup allowed dual-screen interaction, but players were restricted to staying within range of the main console. In contrast, the Switch houses all its primary hardware inside a portable tablet body that seamlessly transitions into a TV dock.
Detachable Joy-Con controllers on the Switch enable instant local multiplayer and offer advanced motion tracking capabilities. The Wii U relied heavily on legacy controllers alongside its GamePad, creating a fragmented input experience for certain games. The streamlined design of the Switch resolved these usability hurdles by presenting a cohesive hybrid experience.
Comparing System Performance and Visuals
In terms of raw computational power, the Nintendo Switch outperforms the Wii U by utilizing a modern mobile architecture. While both systems output at 1080p resolution when connected to a television, the Switch delivers higher framerates and enhanced graphical fidelity. Cross-platform titles frequently display sharper textures and superior environmental effects on the newer hybrid system.
Handheld visual quality also saw a substantial upgrade with the transition to the Switch. The Wii U GamePad featured a standard-definition 480p display, whereas the Switch features a 720p HD screen that offers much clearer visuals. Furthermore, physical cartridges on the Switch provide faster loading speeds compared to the optical discs used by the Wii U.
Game Libraries and Software Ecosystems
The Wii U struggled with sparse third-party support and extended gaps between major first-party game releases. Despite commercial challenges, it produced acclaimed titles such as Xenoblade Chronicles X and original iterations of Super Mario 3D World. However, the system's total software catalog remained relatively small due to low overall console adoption.
The Nintendo Switch built upon its predecessor's legacy by expanding its library through extensive third-party support and steady first-party releases. Many iconic Wii U titles were enhanced and ported to the Switch, reaching significantly broader global audiences. Additionally, the vast indie game selection on the Switch further solidifies its position as one of Nintendo's most comprehensive gaming catalogs.
Risk of Rain 2 Mul T Build Best...
Selecting the best setup for MUL-T in Risk of Rain 2 allows players to turn this heavily armored robot into an absolute powerhouse. With high base health and unique dual-weapon capabilities, mastering this survivor requires combining the right abilities with high-synergy equipment. Understanding how to balance firepower, mobility, and survivability is essential for conquering longer runs on higher difficulty levels.
Top Primary Weapon Choices and Loadouts
MUL-T offers unmatched flexibility thanks to its ability to dual-wield primary weapons. The dual Auto-Nailgun combination stands out as the premier choice for triggering frequent on-hit item effects due to its rapid rate of fire. Alternatively, pairing an Auto-Nailgun with a Rebar Puncher provides a versatile balance between continuous group damage and single-target sniper precision.
Players who prefer high burst damage often choose dual Rebar Punchers while rapidly alternating weapons to bypass natural reload delays. For players seeking extreme close-range destruction, dual Power-Saws deliver massive melee damage per second. Each weapon setup offers distinct strategic advantages depending on your preferred playstyle.
Essential Abilities and Special Skills
Choosing the right special ability dictates how MUL-T manages combat encounters. Power Mode is widely considered MUL-T's strongest special because it equips both primary weapons simultaneously while granting a massive defensive armor bonus. While Power Mode reduces movement speed, the drastic increase in firepower makes it ideal for melting bosses.
For utility, Blast Canister provides reliable area-of-effect stuns that interrupt dangerous elite attacks. Transport Mode serves as MUL-T's main mobility skill, allowing players to charge through enemies with enhanced armor and escape sticky situations quickly. Combining these abilities effectively compensates for MUL-T's slow base movement speed.
Best Items and Synergy Strategies
To maximize MUL-T's output, prioritizing attack speed items like Soldier's Syringe and Predatory Instincts is vital. Proc-chain items like Ukulele and AtG Missile Mark II benefit tremendously from the fast firing rate of the Auto-Nailgun. Furthermore, stacking Crowbars yields incredible single-target burst when utilizing the Rebar Puncher against full-health targets.
Defensive items also play a major role in keeping MUL-T alive during extended boss fights. Items like Repulsion Plate Armor and Medkit pair exceptionally well with MUL-T's natural armor bonuses during Power Mode. Acquiring movement speed items such as Paul's Goat Hoof is necessary to overcome the survivor's sluggish innate movement.
Optimal Equipment Selections
MUL-T's default Retool ability allows the survivor to carry two active equipment items at once. The Disposable Missile Launcher is a top-tier active item choice, offering automatic ranged damage that clears flying targets effortlessly. Royal Capacitor also acts as a devastating single-target burst tool for deleting dangerous elites from a safe distance.
Players running Retool can combine offensive equipment like the Preon Accumulator with utility tools like the Foreign Fruit for instant healing. Taking advantage of Fuel Cells further enhances equipment uptime, ensuring consistent output throughout every stage. Experimenting with these combinations ensures MUL-T remains adaptable against any challenge.

Risk of Rain 2 Mul T Build Best...
Selecting the best setup for MUL-T in Risk of Rain 2 allows players to turn this heavily armored robot into an absolute powerhouse. With high base health and unique dual-weapon capabilities, mastering this survivor requires combining the right abilities with high-synergy equipment. Understanding how to balance firepower, mobility, and survivability is essential for conquering longer runs on higher difficulty levels.
Top Primary Weapon Choices and Loadouts
MUL-T offers unmatched flexibility thanks to its ability to dual-wield primary weapons. The dual Auto-Nailgun combination stands out as the premier choice for triggering frequent on-hit item effects due to its rapid rate of fire. Alternatively, pairing an Auto-Nailgun with a Rebar Puncher provides a versatile balance between continuous group damage and single-target sniper precision.
Players who prefer high burst damage often choose dual Rebar Punchers while rapidly alternating weapons to bypass natural reload delays. For players seeking extreme close-range destruction, dual Power-Saws deliver massive melee damage per second. Each weapon setup offers distinct strategic advantages depending on your preferred playstyle.
Essential Abilities and Special Skills
Choosing the right special ability dictates how MUL-T manages combat encounters. Power Mode is widely considered MUL-T's strongest special because it equips both primary weapons simultaneously while granting a massive defensive armor bonus. While Power Mode reduces movement speed, the drastic increase in firepower makes it ideal for melting bosses.
For utility, Blast Canister provides reliable area-of-effect stuns that interrupt dangerous elite attacks. Transport Mode serves as MUL-T's main mobility skill, allowing players to charge through enemies with enhanced armor and escape sticky situations quickly. Combining these abilities effectively compensates for MUL-T's slow base movement speed.
Best Items and Synergy Strategies
To maximize MUL-T's output, prioritizing attack speed items like Soldier's Syringe and Predatory Instincts is vital. Proc-chain items like Ukulele and AtG Missile Mark II benefit tremendously from the fast firing rate of the Auto-Nailgun. Furthermore, stacking Crowbars yields incredible single-target burst when utilizing the Rebar Puncher against full-health targets.
Defensive items also play a major role in keeping MUL-T alive during extended boss fights. Items like Repulsion Plate Armor and Medkit pair exceptionally well with MUL-T's natural armor bonuses during Power Mode. Acquiring movement speed items such as Paul's Goat Hoof is necessary to overcome the survivor's sluggish innate movement.
Optimal Equipment Selections
MUL-T's default Retool ability allows the survivor to carry two active equipment items at once. The Disposable Missile Launcher is a top-tier active item choice, offering automatic ranged damage that clears flying targets effortlessly. Royal Capacitor also acts as a devastating single-target burst tool for deleting dangerous elites from a safe distance.
Players running Retool can combine offensive equipment like the Preon Accumulator with utility tools like the Foreign Fruit for instant healing. Taking advantage of Fuel Cells further enhances equipment uptime, ensuring consistent output throughout every stage. Experimenting with these combinations ensures MUL-T remains adaptable against any challenge.

How to Install Half Life 2 Mods: Step...
Half-Life 2 remains a cornerstone of PC gaming, and its active community continues to produce remarkable custom content to refresh the experience. Installing mods can transform visual fidelity, introduce total conversion campaigns, or tweak fundamental gameplay mechanics. Learning how to properly setup these modifications ensures a smooth experience without disrupting your base installation.
Preparing Your Game Directory for Modding
Before downloading custom content, you must ensure that Half-Life 2 and the Source SDK Base are properly installed on your system. Launching the base game at least once creates necessary system files and configuration directories required for mods to load correctly. Preparing your file structure beforehand prevents common startup crashes and missing texture errors during gameplay.
You should also locate your Steam installation directory to find the dedicated sourcemods folder. This specific folder acts as the main hub where most single-player mods and community campaigns reside. Keeping your installation organized ensures that Steam can recognize newly added modifications automatically upon restarting.
Installing Steam Workshop and Source Mods
For modern players, the easiest way to add custom content is through integrated platforms like the Steam Workshop. Subscribing to creations automatically downloads and updates custom maps, model swaps, and sound tweaks directly within your client. This automated process minimizes technical hassle and allows for instant testing in-game.
For standalone mods hosted on third-party sites, manual installation requires extracting archive files directly into your sourcemods directory. Make sure to double-check that the extracted folder contains the gameinfo.txt file at its root level. Following a clear guide on How to Install Half Life 2 Mods: Step by Step Modding Guide helps ensure each file path is structured accurately for seamless integration.
Configuring Launch Options and Troubleshooting
After placing files in the correct directories, completely restart your Steam client so it can register the new modifications. Your installed mods should appear directly in your Steam Library alongside your standard games list. From there, you can launch custom campaigns just like any official title in your library.
If a modification fails to launch or crashes during loading screens, verifying the integrity of base game files often resolves the issue. Additionally, checking video settings or setting launch options like windowed mode can bypass graphics driver conflicts. Keeping your base installation updated guarantees maximum compatibility with community content.

Where to Find Firetruck in GTA 5 and...
Securing a Firetruck in Grand Theft Auto 5 is essential for completing certain heist setup missions and causing general mayhem across the city. Whether you need the heavy vehicle for a specific objective or simply want to test its water cannon features, acquiring one is a straightforward process when you know where to look. Understanding the primary spawn locations and quick summon methods will save you valuable time during gameplay.
Fire Station Locations Across Los Santos
The most reliable way to obtain a Firetruck is by visiting one of the primary fire stations scattered throughout San Andreas. The station located on Macdonald Street in Davis frequently features a parked emergency vehicle ready for the taking. Another primary spot is the El Burro Heights station near Capitol Boulevard, which routinely spawns vehicles outside its bays.
If you find yourself exploring the northern countryside of San Andreas, you can visit the station located along Paleto Boulevard in Paleto Bay. While vehicle spawns in rural areas can occasionally be unpredictable depending on the time of day, checking these physical locations offers a guaranteed entry point. Driving directly to a station allows you to choose your vehicle without initiating an immediate police response.
Calling Emergency Services to Dispatch a Firetruck
When you are far from any fire station, the fastest way to get a Firetruck is to summon one directly to your exact location. Players can pull up their in-game mobile phone, open the contacts app, and dial 911 to contact emergency dispatchers. Once connected, selecting the fire department option will immediately prompt an emergency team to drive out to your position.
After placing the call, stand by on a roadside and wait a few moments for the emergency response team to arrive. As soon as the Firetruck pulls up and comes to a complete stop, you can pull the driver out and take control of the vehicle. Keep in mind that stealing an active emergency vehicle will instantly grant you a minor wanted level that you must evade.
Causing Controlled Fires to Bait a Response
Another effective strategy for obtaining a Firetruck involves manually triggering an emergency situation in the open world. Throwing a Molotov cocktail onto grass or causing a small vehicle explosion will immediately initiate an automated fire response. Within a short period, nearby dispatchers will automatically send a crew to extinguish the flames.
This method works best when executed in populated city areas where emergency response times are remarkably fast. Once the truck arrives and the firefighters begin using their equipment, you can quickly hijack the vehicle and drive away. Be careful not to let the flames spread to your position while waiting for the truck to arrive.
Tips for Stealing and Escaping with the Firetruck
Once you step inside the driver seat, managing your escape route becomes the highest priority to avoid losing your vehicle. Because the Firetruck is a large and heavy vehicle, navigating narrow alleys or sharp turns can slow down your getaway momentum. Plan a route onto wide highways where you can leverage the vehicle weight to ram through police barricades.
Additionally, utilizing the top-mounted water cannon allows you to push away hostile NPCs or clearing paths while driving. Once you lose the police line of sight, hide in secluded alleyways or beneath overpasses until your wanted level disappears. With the wanted level clear, your Firetruck is completely ready for any heist preparation or open-world exploration.

Daredevil Season 3 Black Suit And The Significance...
When Marvel's Daredevil returned for its third season, fans immediately noticed a dramatic shift in Matt Murdock's appearance as he discarded his armored red suit. Instead, the Devil of Hell's Kitchen reverted to his original, minimalist black vigilante outfit composed of simple cloth and ropes. This visual regression was far more than a practical choice, signaling a profound psychological and thematic evolution for the character.
A Return to Grounded Beginnings
Abandoning the high-tech red armor represented Matt Murdock's complete rejection of his elevated superhero persona following the devastating events of The Defenders. Severely injured and emotionally broken, Matt stripped away the symbol of Daredevil to reconnect with his most fundamental, unrefined instincts. The simple black fabric served as a physical representation of his vulnerability and raw determination.
By shedding his body armor, Matt placed himself in genuine physical danger during every encounter. This tactical downgrade forced him to rely strictly on his senses, martial skills, and sheer willpower rather than technological advantages. The dark aesthetic emphasized a street-level vigilante battling in the shadows of Hell's Kitchen once again.
Symbolism of Faith and Identity Crisis
The black suit in Season 3 directly reflects Matt's crisis of faith and growing disillusionment with justice. Having felt abandoned by God, he no longer wished to act as a righteous protector wearing a heroic symbol. The dark attire allowed him to distance himself from the ideal of Daredevil while embracing a darker, more cynical path.
During this period of intense internal conflict, Matt viewed his civil identity as a burden rather than a life worth saving. The black mask obscured his face completely, mirroring his desire to erase Matt Murdock entirely and exist only as a weapon against crime. This stark outfit matched his bleak outlook on his mission and his place in the world.
The Narrative Contrast With Bullseye
Season 3 masterfully creates a stark visual contrast between Matt in his black suit and Benjamin Poindexter wearing the stolen red armor. As Poindexter tarnishes Daredevil's reputation by committing atrocities in the red suit, Matt's black attire becomes the symbol of the true hero. The physical battle transforms into a conflict over what truly defines a hero—the suit or the man beneath it.
This rivalry proves that armor does not grant morality or heroism to its wearer. While Poindexter uses the red suit to inflict chaos, Matt fights in simple cloth to restore truth and protect his city. The visual dynamic reinforces that Matt's heroic spirit exists independently of any official costume.
The Enduring Impact of the Dark Attire
Ultimately, the black suit in Daredevil Season 3 remains one of the most compelling artistic choices in modern superhero television. It grounds the narrative, elevates the emotional stakes, and provides a raw, visceral look at a hero rebuilding himself from rock bottom. By the time the season concludes, the journey through darkness allows Matt to reclaim his identity with renewed purpose and strength.

Great Abandoned Central Mine Bargainer Statue Location And...
Exploring the vast and shrouded subterranean realm of the Depths in Tears of the Kingdom introduces adventurers to numerous unique entities, none more intriguing than the massive stone structures known as Bargainer Statues. Among these ancient figures, the one resting deep beneath Central Hyrule holds a significant place for progression, offering valuable armor and inventory replenishment options. Locating this hidden merchant requires a deep descent, careful navigation of forgotten structures, and the completion of an extensive side adventure to truly unlock its potential.
How to Find the Great Abandoned Central Mine
The journey to this hidden entity begins by making your way to the Great Plateau on the surface world and locating one of its four main chasms. Diving down into either the North or East Chasm provides the most direct route toward the central mining complex. Once you touch down in the dark wilderness, navigating toward the glowing structure in the distance will guide you smoothly to the entrance of the main facility.
To make future exploration much easier, it is highly recommended to seek out and activate the Nogukoyk Lightroot located right beside the North Chasm entrance. Illuminating this sector helps dispel the thick gloom and reveals the pathways twisting through the rocky ruins. Following the old minecart rails winding westward will eventually deposit your character directly at the foot of the massive stone complex.
Locating the Hidden Bargainer Statue Room
Once you arrive at the forge area where the construct trader operates, you must look closely for a concealed lower chamber rather than exploring the upper platforms. Head toward the back section of the forge near the broken stone bridge where ancient Zonai wings often rest. Nearby, a small flight of stairs leads downward past a weathered Gerudo statue, revealing a hidden opening tucked tightly into the foundation wall.
Dropping down through this hole brings you into a large, secluded stone chamber where the giant Bargainer Statue sits quietly in the dark. Unlike its smaller brethren found above ground, this massive entity requires a specific set of requirements to be met before you can engage in direct trade. Understanding the layout of this chamber is crucial, as you will return here frequently once the entity is fully awakened.
Awakening the Statue with A Call from the Depths
Interacting with the stone face for the first time reveals that the entity is currently trapped and unable to speak or trade normally. To properly initiate its services, players must embark on the comprehensive side adventure known as A Call from the Depths. This quest line requires draining a trapped pool near the Great Plateau's northern gate to recover a hidden stone head, which sets the overarching mission into motion.
The main task involves visiting four distinct chasms across the surface plateau to locate four missing stone eyes that must be tossed into the abyss. After dropping each eye down, players must dive into the darkness, secure the artifact, and transport it safely back to the central mine chamber using nearby Zonai vehicles. Successfully slotting all four eyes into the statue's empty sockets restores its full consciousness and unlocks its valuable trading inventory.
Valuable Rewards and Trading Mechanics
Completing this intricate rescue mission immediately rewards players with a vital choice between receiving an extra Heart Container or a Stamina Vessel segment. Additionally, restoring this entity grants full access to a unique shop that accepts the glowing blue Poes found floating throughout the underworld landscape. This specific trader is highly sought after because it allows players to purchase powerful gear pieces like the Dark Armor set and the protective Depths equipment.
Furthermore, this merchant provides an essential service by allowing you to re-purchase unique weapons or rare armor pieces that have broken or been lost during your journeys. Spending your collected spirits here ensures your inventory remains fully optimized for the treacherous encounters waiting across Hyrule. Returning regularly to this illuminated cavern helps turn your collected Poes into some of the most beneficial survival tools available in the game.

How To Get Weapons In TF2 And Build...
Team Fortress 2 remains one of the most enduring multiplayer shooters due to its diverse character classes and deep tactical variety. Central to this experience is your loadout, as changing your gear completely alters how a class functions on the battlefield. Understanding how to collect new items efficiently allows players to adapt to any combat scenario and enjoy the game to its fullest potential.
Understanding the Random Item Drop System
The most common way to expand your collection is through the built-in text simulation of the random drop system. While you actively play on secure servers, the game automatically grants random items at regular intervals each week. This passive system ensures that everyone can steadily build up their armory simply by enjoying regular matches.
There is a maximum allocation of drops you can receive every week, which resets every Thursday morning. If you happen to hit this cap early, you will need to wait for the weekly reset before more items can appear in your inventory. This mechanism keeps the distribution balanced and fair for the entire player community.
Completing Class Specific Achievements
For players who prefer a direct milestone approach, conquering specific in-game challenges is an excellent strategy. Each of the nine distinct classes features a set of milestones that reward fixed gear items upon completion. This method allows you to target specific upgrades rather than relying entirely on random luck.
By achieving these milestones, you guarantee yourself essential loadout options like the Pyro's Flare Gun or the Medic's Kritzkrieg. It provides a reliable roadmap for newcomers who want to establish a functional foundation for their favorite classes quickly. Tracking these milestones in your main menu makes it easy to see which challenges to focus on next.
Utilizing the Crafting Blueprint System
When you accumulate duplicate items from random drops, the internal crafting system allows you to recycle them into something useful. By combining unwanted gear, you can forge specialized metal components used to build precise blueprints. This system gives purpose to every single piece of duplicate loot you find during your career.
Using specific blueprints, you can intentionally create the exact loadout pieces you need to complete a set. While it requires sacrificing several basic items, it offers a deterministic path toward completing your collection. Managing your resources wisely ensures you never run out of materials for future blueprints.
Trading and Community Market Options
Engaging with the active global community opens up the fastest avenues for acquiring specific tactical gear. The integrated trading network allows players to swap items directly with one another based on mutual needs. This social aspect has kept the community thriving and highly interconnected for over a decade.
If you prefer a streamlined experience, utilizing official community platforms can save you plenty of time. For those looking to manage their digital lists smoothly, implementing a drag and drop sortable list tool can greatly enhance how you organize your trade offers and inventory layouts before negotiating. This practical approach ensures you always know what assets you have available for swap.

Revere Satellite Array Fallout 4 Location and Quest...
Navigating the irradiated ruins of the Commonwealth in Fallout 4 often leads players to formidable military structures packed with hidden dangers and valuable loot. Among these prominent landmarks, the Revere Satellite Array stands out as a highly contested fortified outpost that demands tactical preparation and cautious exploration. Surviving this hostile complex requires a solid understanding of its layout and the unique enemy factions patrolling its massive radar towers.
Finding the Array in the Commonwealth
The Revere Satellite Array is situated in the northeastern quadrant of the world map, positioned directly northeast of the Boston Airport and southeast of Malden Center. Players can easily identify the location from a distance by looking for the massive, towering satellite dishes stretching into the post-apocalyptic skyline. Approaching the perimeter requires extreme caution, as the surrounding fields offer very little natural cover from long-range defensive fire.
Before planning your infiltration, ensuring your character is properly leveled and armed with high-damage weaponry is strongly recommended to handle sudden ambushes. If you are exploring nearby zones, checking the local map can help guide your trajectory toward this heavily guarded landmark safely. Navigating this region carefully will eventually bring you face-to-face with one of the most stubborn defensive lines in the game.
Conquering the Super Mutant Stronghold
The entire installation is currently occupied by a lethal contingent of Super Mutants who have converted the elevated satellite dishes into strategic sniper nests. Heavy weapons fire, including missiles and miniature nuclear devices, is common as soon as your presence is detected near the outer walls. Sneaking through the lower wooden scaffolding allows clever players to neutralize these threats individually before the entire base alerts to your position.
Climbing the steep staircases attached to each dish provides a clear tactical advantage but leaves you exposed to crossfire from neighboring platforms. Utilizing long-range rifles to pick off the defenders on the opposing towers can significantly lower the overall difficulty of the assault. Once the upper platforms are secure, you can freely search the area for structural secrets and rare military supplies scattered across the metal catwalks.
Associated Quests and Valuable Collectibles
While the array does not serve as the primary focus for a mainline story mission, it is frequently chosen as a target location for various radiant quests. Factions like the Brotherhood of Steel and the Railroad often send the Sole Survivor here to recover lost artifacts or eliminate dangerous mutant warbands. Additionally, the complex plays a crucial role in the quest titled The Lost Patrol, where players must track down a missing Brotherhood squad by following an active distress signal.
The physical rewards for successfully clearing the installation are highly prized by collectors and survivalists alike. Dedicated scavengers can discover a copy of the US Covert Operations Manual hidden inside one of the shacks built on top of the central satellite dishes. This rare magazine provides a permanent boost to your character's overall stealth capabilities, making the dangerous climb well worth the investment.

mastercrafted feline steel sword location Mastercrafted Feline Steel...
In The Witcher 3: Wild Hunt, maximizing your combat efficiency requires hunting down specialized weapon schematics scattered across the Continent. The Feline gear set remains a favorite choice for players who prefer fast attacks and high critical damage metrics. Tracking down the final tier of these blueprints demands that monster hunters travel to the harsh northern islands of the Skellige archipelago.
The Journey to Kaer Gelen in Skellige
The highly coveted mastercrafted schematic is safely tucked away within the frozen mountain ranges of central Ard Skellig. To start your search, you must navigate your way toward the ancient ruined fortress known locally as Kaer Gelen. The old stone outpost sits slightly north of the central mountains and is heavily guarded by aggressive local wildlife and wraiths.
Approaching the fortress requires careful climbing along the rocky cliffs due to steep dropoffs and unexpected monster ambushes. It is highly recommended that you prepare proper swallow potions and repair your current silver weapons before crossing the threshold. Once you manage to breach the primary stone entrance, you will need to head deeper into the lower subterranean chambers.
Locating the Hidden Schematic Chest
Inside the dark stone ruins, players must look for a narrow set of stairs leading down into an alcove hidden behind the main collapsed walls. A heavy wooden chest contains the precise blueprint needed to unlock the absolute highest tier of this light armor weapon category. You should use your witcher senses to easily highlight the container if the low lighting makes standard navigation difficult.
Successfully looting the chest unlocks the formula for the legendary feline steel sword. This specific level of gear cannot be constructed immediately and requires players to have the superior variant already sitting in their active inventory. It also requires the professional assistance of a specialized smith who has completed their own personal storyline objectives.
Crafting Requirements and Master Blacksmith Services
Once you secure the diagram from the ruins, you must find a craftsman capable of handling such a delicate weapon project. The master elven blacksmith Hattori, located in the docks district of Novigrad, is the most reliable choice for this specific job. However, his specialized services will remain locked until you complete his introductory quest involving underground culinary rivalries.
Gathering the necessary raw components is the final step toward wielding this exceptionally powerful blade on the battlefield. The recipe demands specialized materials including dark steel ingots, monster bones, and flawless ruby fragments to secure the full performance bonuses. Bringing these items to Hattori will grant you a swift blade that significantly boosts your overall attack power and bleed chances.

Five Star Meals in Dreamlight Valley for Cooking...
In Disney Dreamlight Valley, mastering the culinary arts is a vital skill that serves multiple gameplay purposes. Preparing five-star meals requires a precise blend of five unique ingredients, unlocking maximum energy reserves for players as they clear obstacles across the biomes. Beyond expanding your personal recipe collection, these complex culinary masterpieces serve as an excellent mechanic for strengthening community bonds.
The Dual Benefits of High Tier Cooking
Cooking top-tier recipes serves a vital dual purpose by providing a substantial boost to both individual stamina and villager progression. When players consume a five-star meal, it pushes their energy bar into the golden tier, granting a significant movement speed increase. This temporary enhancement makes navigating the valley and managing resources dramatically more efficient during extended play sessions.
Additionally, these intricate dishes frequently appear as requested daily items or restaurant orders for the valley's diverse residents. Delivering a perfectly prepared five-star recipe to a favorite character offers a massive multiplier for their friendship level. Utilizing high-value food preparation effectively streamlines the path toward unlocking special character quests and unique decorative rewards.
Popular Five Star Recipes for Efficient Progression
Identifying recipes that balance high friendship yields with accessible ingredients allows players to optimize their valley routines. Complex appetizers like the Large Seafood Platter combine versatile seafood choices with a single lemon to satisfy demanding villagers. For sweet options, baking a classic Pastry Cream and Fruits utilizes easily farmed berries alongside standard pantry staples like milk and sugarcane.
Savory main courses such as Bouillabaisse offer another reliable method for fulfilling character requests using basic ocean foraging. This robust dish combines various fresh catches with shrimp, tomatoes, and vegetables to create a premium meal. Keeping a steady stockpile of these strategic crops guarantees that players can always fulfill restaurant orders on short notice.
Maximizing Friendship Rewards in the Valley
While gifting flowers and gems offers steady progression, serving premium meals inside Chez Remy remains the most efficient method to build community status. Serving a resident their requested five-star order directly inside the restaurant generates an immediate boost to their companion metric. This targeted feeding strategy proves especially useful when trying to level up hard-to-reach characters or late-game arrivals.
Pairing these culinary activities with daily hangout tasks ensures a comprehensive approach to building local relationships. Bringing along a designated gardening or mining companion while gathering your cooking supplies creates a continuous loop of positive progression. Embracing this holistic approach helps players cultivate a thriving community while maintaining full energy reserves for ongoing development projects.

Torgue O Torgue O Quest And Challenge Guide
Borderlands: The Pre-Sequel introduces players to the erratic environments of Elpis, Pandora's moon, featuring localized low-gravity situations and unique mission paths. Among the early side quests that offer distinct choices is the colorful task assigned by Janey Springs. Navigating this explosive piece of optional content effectively can reward players with powerful elemental weaponry tailored to their playstyle.
How to Unlock and Start the Mission
To begin this specific exploration, vault hunters must first complete the main story mission titled Marooned in Serenity. After securing basic equipment, players can head over to Janey Springs at her workshop located within the Serenity's Waste region. She will offer a variety of side jobs, including the quest to retrieve a powerful light reactor from a crashed scavenger ship.
Following the quest marker leads players directly to the wreckage site, which is guarded by aggressive local scavengers. Clearing the initial wave of enemies allows you to interact with the console and safely dislodge the reactor core. Once the target object is secured, Mister Torgue will suddenly intercept your radio communications with a completely different proposal.
Evaluating the Crossroads Choice
The core dilemma of this mission centers entirely on who receives the recovered core. Janey Springs requests the item to restore localized power utilities and offers a unique laser weapon as compensation. Choosing her route rewards you with a reliable energy tool capable of melting shields and keeping long-range targets controlled.
Conversely, Mister Torgue wants you to overload the reactor in a nearby disposal chute to trigger a massive explosion. Taking this route means turning down the local mechanic in favor of high-impact explosive gear. Deciding which reward better fits your current character level and active skill trees is essential before interacting with either delivery station.
Completing the Map Challenges
Beyond the primary narrative choice, the surrounding Serenity's Waste territory features unique zone objectives that can be finished concurrently. Players can utilize the low-gravity environment to perform elongated boost jumps across jagged canyons to find hidden vault symbols. Collecting these glyphs boosts your overall badass rank and improves baseline statistics across all characters.
Additionally, hunting down the rare Kraggon variants scattered throughout the icy crags provides supplementary experience points and valuable moonstone drops. Aligning your weapon loadout to exploit elemental vulnerabilities will speed up these encounter timers drastically. Managing your oxygen levels throughout these engagements ensures your shield capacities remain stable during surprise ambushes.
Maximizing Mission Rewards
Vanguard players looking to collect every unique firearm variant usually calculate their approach based on character class needs. Wilhelm and Athena benefit heavily from the laser variations provided by Janey due to their inherent elemental stacking perks. Meanwhile, characters built for raw destructive impact can leverage the explosive splash radius offered by the alternative reward path.
Whichever direction you ultimately choose, turning in the item updates your local map progress and clears the quest log efficiently. Taking time to explore optional paths early ensures your vault hunter stays properly leveled for the upcoming challenges in Concordia. Balancing narrative curiosity with optimal gear acquisition remains the hallmark of an effective survival strategy on Elpis.

How To Connect PS5 Controller To PC With...
The PlayStation 5 DualSense controller is widely celebrated for its advanced haptic feedback and ergonomic design, making it an excellent choice for PC gamers seeking an immersive experience. Fortunately, integrating this sophisticated gamepad into a desktop environment is an incredibly straightforward process that takes only a few minutes. Whether you prefer the absolute stability of a physical wire or the freedom of a wireless configuration, modern operating systems make synchronization seamless.
Connecting Instantly with a Wired USB Connection
The most immediate and reliable method to establish a connection is by using a standard physical cable. Gamers simply need to plug a high-quality USB-C to USB-A or USB-C to USB-C cable into the controller and an open port on their computer. Windows will instantly recognize the hardware, allowing you to jump directly into your favorite titles without navigating complicated setup menus.
Using a wired setup provides several distinct structural advantages over wireless protocols. It completely eliminates input latency, ensuring that your actions register with pixel-perfect precision during intense competitive matches. Furthermore, a wired connection ensures that your gamepad charges continuously while you play, preventing unexpected disconnects during lengthy gaming sessions.
Pairing over Bluetooth for Wireless Freedom
For individuals who prefer a clean desktop layout free from tangled wires, utilizing the built-in Bluetooth protocol is an ideal alternative. To initiate this process, make sure your computer has active Bluetooth capabilities turned on through the system settings menu. Next, press and hold the central PS button and the top-left Create button on your DualSense gamepad simultaneously until the light bar begins to flash rapidly.
Once the device enters its discovery state, open the Bluetooth management menu on your computer and click the option to add a new device. Select the wireless controller from the populated list of nearby hardware to finalize the pairing sequence. The light bar will settle on a solid color indicator, signaling that your wireless gamepad is ready for deployment.
Optimizing Performance and Advanced Features through Steam
While basic plug-and-play functionality works well across many standard desktop environments, utilizing specialized client platforms unlocks the true potential of your hardware. Many desktop applications offer extensive configuration suites that allow users to customize button layouts, adjust thumbstick sensitivity curves, and manage internal LED brightness levels. This deep level of personalization helps tailor the device to your exact mechanical preferences.
Furthermore, running your favorite titles through specialized gaming clients ensures a broader compatibility layout for older games that might not natively support modern inputs. It bridges the structural gap between console architecture and desktop software. For players who want to explore extensive communities or share custom input configurations online, utilizing your personal Steam account provides a great platform for tracking your global progress and connecting with other gamers.
Enabling Immersive Haptics and Adaptive Triggers
To experience premium native features like adaptive trigger resistance and high-fidelity haptics, certain criteria must be met within the desktop environment. Most mainstream PC titles require the controller to remain plugged in via a USB cable to transmit the dense audio data required for complex haptic sensations. Developers are increasingly adding this native support directly into modern PC releases, creating parity with console versions.
Before launching an immersive game, it is highly recommended to disable external input emulation software to let the game communicate directly with the hardware. Checking the audio output settings on your desktop is also crucial, as the operating system may accidentally route system sound through the controller's internal speaker. Proper audio configuration ensures that the tactile feedback functions precisely as the sound designers intended.

Saints Row 2 Activity Rewards Complete Unlockables Guide
Saints Row 2 remains a high-water mark for open-world chaotic freedom, largely due to its deeply rewarding progression loop that pairs side content with highly desirable gameplay bonuses. Unlike modern sandbox titles that rely heavily on monetization or minor cosmetic drops, Volition designed a system where conquering Stilwater's illicit side hustles directly enhances your character's capabilities. Navigating these various neighborhood tasks unlocks unique weapons, customizable vehicles, permanent passive perks, and elite combat homies that dramatically alter how you approach the main storyline.
Passive Bonuses and Character Upgrades
Stepping into the high-stakes challenges scattered across Stilwater is the fastest way to turn your custom gang boss into an indestructible force. Activities like Insurance Fraud are highly favored by veteran players because conquering specific levels grants permanent physics adjustments, such as drastically reduced vehicle damage during high-speed collisions. Meanwhile, completing intense tasks like Fuzz allows you to secure unlimited pistol ammunition, eliminating the need to constantly spend your hard-earned cash at local gun shops.
Other side ventures offer crucial defensive buffs that make surviving intense police heat or rival gang wars significantly easier. Engaging in the dynamic driving challenges of Snatch or Escort rewards players with increased health regeneration speeds and higher stamina pools. These cumulative upgrades ensure that dedicating early game hours to side ventures makes the challenging late-game narrative missions much more manageable.
Custom Vehicles and Elite Weapons
Beyond character stats, mastering these neighborhood challenges expands your personal garage with unique custom rides that cannot be acquired through standard theft. Completing high-level checkpoints in the Racing activity or delivering specified targets in Chop Shop adds specialized high-performance sports cars and heavy-duty combat trucks directly to your inventory. These vehicles often feature unique pre-installed visual modifications and enhanced durability stats built specifically for street warfare.
Your offensive arsenal receives a massive upgrade as well when you successfully push through the final tiers of combat-heavy missions. Successfully managing the chaotic explosive tasks in Mayhem or Heli Assault grants players early access to high-tier weaponry, such as specialized submachine guns and devastating rocket launchers. Wielding these heavy armaments during early turf takeovers gives the Third Street Saints an immediate and overwhelming tactical advantage over their corporate and street-level rivals.
Unlocking Gang Homies and Style Options
Building a criminal empire requires reliable muscle, and the side content serves as the primary gateway for recruiting elite combat companions to roam the streets with you. Progressing through specific narrative-driven side ventures unlocks unique homies who can be called directly via your in-game mobile phone to provide immediate fire support during intense shootouts. Some of these unlockable allies bring specialized combat gear or unique defensive vehicles when they arrive on the scene to protect your turf.
Furthermore, complete completion of individual neighborhood tasks awards exclusive clothing sets, rare weapon skins, and unique crib customization styles that showcase your absolute dominance over Stilwater. These stylistic items let players personalize their criminal syndicate to reflect their specific achievements, adding a layer of visual prestige to the chaotic gameplay. Balancing story progression with these optional distractions ensures a comprehensive and incredibly varied sandbox experience.

PlayStation Network Not Connecting PS5 Fixes for Common...
Experiencing connectivity issues on your PlayStation 5 can instantly disrupt your gaming sessions and leave you feeling frustrated. When the console refuses to log into the PlayStation Network, the issue usually stems from a combination of local hardware configurations, software glitches, or temporary server outages. Fortunately, navigating these common errors requires a few systematic troubleshooting steps to restore your digital environment.
Verifying PlayStation Network Status and External Issues
Before modifying any advanced settings on your console, it is essential to determine whether the problem lies with your equipment or on Sony's end. Checking the official PlayStation Network status page helps identify active incidents that could affect sign-in processes globally. If an outage is reported, waiting for the technical team to resolve the server-side bug remains the best course of action.
In many instances, players mistake a widespread network disruption for a localized hardware failure on their brand-new consoles. If the servers are fully operational but your console still logs an error, you should proceed to evaluate your home network performance. Distinguishing between human input errors, like incorrect account credentials, and actual connectivity drops will streamline your recovery process.
Optimizing Local Network and Ethernet Connections
The stability of your internet connection plays a vital role in keeping your PlayStation 5 synced with online multiplayer platforms. If you are currently utilizing a wireless configuration, shifting to a physical connection can drastically reduce dropped signals. Connecting a high-speed wired ethernet cable directly from your router to the console ensures maximum bandwidth efficiency.
For players who must rely entirely on a wireless setup, checking the placement of your internet router is highly recommended. Physical infrastructure damage, thick walls, and distance can easily create weak channels that hinder your system from obtaining a proper handshake. Power cycling your home router by unplugging it for a few minutes often clears internal memory caches and improves local data routing.
Adjusting Advanced PlayStation 5 Network Settings
When basic restarts fail to yield results, dive into the integrated system configurations to manually bypass deep-seated communication barriers. Navigating to the network settings menu allows you to modify the Domain Name System settings which handle how your console identifies internet locations. Swapping your default configuration to reliable public alternatives often stabilizes erratic servers.
Additionally, manually selecting your Wi-Fi frequency band within the console's advanced options menu can resolve intermittent drops. Forcing the system to prioritize either a stable long-range frequency or a fast short-range band prevents the hardware from constantly switching channels. Ensuring that your PlayStation 5 console system software is fully updated to the latest version will also eliminate underlying bugs causing network failures.
Managing Account Status and Database Restructuring
Sometimes the issue is tied directly to your active profile synchronization rather than the physical wires powering your entertainment setup. Signing completely out of your PlayStation Network account and executing a fresh sign-in process forces the server to update your profile entitlements. This straightforward step addresses minor software glitches that occur during sudden system sleep cycles.
If the error persists across multiple user profiles, booting your console into safe mode presents a powerful diagnostic path. Selecting the option to rebuild your system database allows the hardware to reorganize scattered files without erasing your precious game data. This structural cleanup guarantees that corrupted data fragments will not interfere with the critical network protocols required for online authentication.

Is GTX 1650 Good For Gaming
The NVIDIA GeForce GTX 1650 has long been a staple in budget gaming setups due to its affordability and low power consumption. As modern video games continue to push the boundaries of visual fidelity and system requirements, many players wonder if this classic card can still hold its ground. Evaluating its underlying hardware limitations and real-world performance across popular titles is essential to determine if it remains a viable choice for consumers today.
Performance in Competitive Esports Titles
When it comes to lightweight competitive multiplayer games, the GTX 1650 delivers a highly satisfying and responsive experience. Popular titles like Valorant, League of Legends, and Counter-Strike are specifically optimized to run smoothly on mature hardware architectures. Budget-conscious players can easily achieve fluid frame rates well above 60 frames per second at standard high graphical settings.
This reliable delivery makes the graphics card an excellent entry point for casual competitive enthusiasts operating on a strict budget. Lowering a few demanding graphic configurations can even push the performance past 100 frames per second to fully utilize high refresh rate monitors. For these specific gaming environments, the legacy entry-level component remains exceptionally useful and cost-effective.
Handling Demanding Modern AAA Games
Venturing into the world of graphically intense cinematic releases presents a much bigger challenge for this aging hardware architecture. Massive open-world titles like Red Dead Redemption 2 and demanding simulation blockbusters heavily tax the card's processing cores. To maintain playable performance levels, enthusiasts must adjust their personal expectations and aggressively lower their overall visual parameters.
Running modern blockbusters typically requires dropping the display resolution to standard 1080p and utilizing a careful mix of medium and low presets. While you can still achieve a relatively stable 30 to 50 frames per second, the visual experience will lack the crisp textures found on current generation systems. It is fully capable of launching most modern software, but the raw performance demonstrates clear hardware boundaries.
The Impact of VRAM Limitations
One of the primary performance bottlenecks facing this graphics processing unit is its limited onboard frame buffer capacity. Equipped with only 4GB of video random access memory, the card frequently runs out of storage space when handling complex modern asset textures. Current game engines regularly demand significantly more memory even when operating at modest resolution configurations.
When a particular game title exceeds this strict hardware memory limit, players will experience sudden frame drops, annoying stuttering, and objects popping into view unexpectedly. This constraint prevents the computer system from maintaining smooth performance during chaotic online action sequences. Gamers looking to explore highly detailed virtual landscapes will find this technical limitation increasingly frustrating over time.
Final Verdict and Better Alternatives
Ultimately, determining whether the GTX 1650 is suitable for your computer build depends entirely on your specific interactive entertainment goals. It serves as a dependable baseline repository for indie titles, esports environments, and older PC game libraries. However, it lacks the technical longevity needed to safely navigate the incoming wave of current-generation software releases.
If your financial budget allows, exploring slightly newer graphics card options will offer significantly better long-term hardware value. Modern alternatives provide advanced engineering features such as artificial intelligence resolution upscaling and dedicated architectural ray tracing capabilities. Investing a little more capital today will drastically improve your overall system longevity and elevate your personal visual enjoyment.

Persona 5 Royal Bad Ending Explained
Navigating the intricate narrative of Atlus's acclaimed RPG masterpiece presents players with numerous moral crossroads that permanently alter the fate of the Phantom Thieves. While the definitive true conclusion emphasizes personal growth through overcoming genuine hardships, the game introduces a highly sophisticated alternative perspective through its third-semester narrative layers. This specific branch introduces a deeply philosophical scenario that completely subverts traditional concepts of a tragic failure in video game storytelling.
The Nature of Takuto Maruki Counterproposal
The core of this unique alternative conclusion rests entirely upon an enticing agreement offered by the counselor, Takuto Maruki, during the final month of the extended storyline. He possesses the reality-warping capability to construct a flawless utopian society where human suffering and personal trauma are entirely erased from existence. Accepting his peaceful arrangement skips the final collaborative dungeon sequence entirely and transitions the narrative directly into a serene timeline.
In this newly manufactured reality, every single member of the phantom crew instantly achieves their deepest, most desperate life aspirations without facing structural resistance. Deceased family members suddenly return to life, fractured relationships are perfectly mended, and the overall societal burden evaporates completely. This transformation provides an immediate sense of absolute emotional comfort that appears overwhelmingly positive on its initial surface presentation.
Subtle Distortions in a Flawless Reality
Despite the initial appearance of absolute bliss, paying close attention to the environment reveals several deeply unsettling environmental details hidden beneath the utopian surface. The protagonists effectively sacrifice their independent free will and individual determination to remain trapped inside an artificial, eternally blissful loop of forced contentment. Personal development is completely halted because the characters no longer have any authentic challenges or personal obstacles left to overcome.
A particularly chilling artistic choice manifests during the final celebratory photograph captured inside the iconic Leblanc cafe location. While the rest of the cast smiles radiantly, the protagonist and Goro Akechi look directly at the player's screen with deeply knowing expressions. This brief moment reveals that they remain the only individuals fully aware that their current paradise is merely an idealized fabrication built upon individual complacency.
The Philosophical Cost of Forced Complacency
The thematic message behind this specific conclusion directly challenges the human desire to escape from authentic emotional pain at the cost of genuine personal identity. By accepting the easy way out, the high school vigilantes completely abandon their foundational mission of reforming society through collective human effort. This moral compromise ultimately transforms their vibrant rebellion into absolute stagnation under the complete guidance of a benevolent dictator.
Ultimately, this narrative route stands out as a brilliant piece of interactive storytelling because it reframes failure as a state of artificial, unearned perfection. Players are left to contemplate whether a peaceful life devoid of individual choice can ever truly be considered a successful outcome. It serves as a powerful reminder that authentic human triumph requires acknowledging and processing the inherent struggles of the real world.

Rainbow Six Siege Pro Settings for Competitive Players
Optimizing your configuration in Rainbow Six Siege is essential for achieving consistent performance in ranked matches. Professional players fine-tune their visual, audio, and control options to maximize reaction speed and overall clarity. By making targeted adjustments, competitive players can gain a distinct tactical advantage during high-stakes gunfights.
Display and Field of View Optimizations
Most professional players prefer running the game on lower visual settings to guarantee high frame rates. A higher frame rate reduces input latency and ensures smooth character movement across intense combat scenarios.
Setting your Field of View between 84 and 90 expands peripheral vision without distorting distant targets. Playing on a 16:10 or 4:3 aspect ratio can also make opponent character models appear wider, making them easier to target.
Mouse Sensitivity and Control Calibration
Precision aiming in tactical shooters relies heavily on low mouse sensitivity for consistent crosshair control. Operating at 400 or 800 DPI allows players to make micro-adjustments easily while holding tight angles.
Lowering vertical and horizontal sensitivity prevents over-shooting during fast flick shots. Fine-tuning your aim-down-sights multiplier ensures that muscle memory remains consistent across different optical zoom levels.
Graphics Settings for Maximum Visual Clarity
Competitive players disable heavy graphical features like motion blur, depth of field, and lens flare. Turning off these visual effects eliminates unnecessary screen clutter that can obscure enemy movements.
Shadow settings should be kept on medium to allow opponent shadows to render without hurting system performance. High texture filtering helps keep distant environment edges sharp, allowing you to spot subtle movement through small line-of-sight gaps.
Audio Configurations for Spatial Awareness
Hearing enemy footfalls and gadget deployments is vital for making accurate tactical decisions. Using the Night Mode audio preset compresses sound frequencies, making quiet footsteps louder while lowering the volume of loud explosions.
A balanced stereo headset setup provides accurate spatial positioning without artificial surround sound distortion. Clear sound cues help players predict enemy pushes through walls and barricades well before visual contact is made.

Sims 4 PC Controller Support and Setup Guide
Navigating the vibrant neighborhoods of The Sims 4 on a computer usually involves using a traditional keyboard and mouse setup. However, many virtual architects prefer the ergonomic comfort of a console gamepad to manage their households. Shifting your control scheme can significantly alter how you interact with the game, making long sessions much more relaxing.
Understanding Native Limitations on PC
Unlike its console counterparts, the PC edition of this popular life simulation does not feature plug-and-play native gamepad functionality out of the box. The game engine is fundamentally optimized for mouse inputs, meaning players cannot simply connect a hardware device and expect instant menu navigation. Fortunately, dedicated players can bridge this gap by utilizing external software translation utilities.
To achieve seamless integration, players frequently rely on platform-level configurations to translate gamepad inputs into traditional keyboard commands. Emulating these controls correctly ensures that you do not lose out on precise camera movements or quick UI selections. Understanding this basic limitation is the first step toward building a highly personalized sandbox experience.
Setting Up Controllers via Steam Input
The most reliable method for introducing gamepad functionality to your life simulation involves utilizing the robust software mapping tools provided by Valve. By adding the game launcher to your library as a non-Steam application, you unlock the ability to customize your inputs extensively. This platform allows your system to recognize modern hardware configurations easily, bypassing traditional software barriers.
Once the game is integrated into the client, you can navigate to the controller configuration menu to download community-created layouts. Many users have perfected templates that map the mouse cursor directly to the right analog stick for easy build mode management. This configuration process ensures your device behaves precisely like the official console versions.
Optimizing the EA App and Third Party Tools
Players who launch their titles exclusively through the EA App must take an extra step to ensure hardware compatibility. It is crucial to close down conflicting background applications that might attempt to seize control of your connected hardware simultaneously. Keeping your device configurations clean prevents unexpected camera spinning or dead zones during active gameplay.
If you prefer not to use Valve software, alternative programs like DS4Windows or reWASD offer excellent remapping environments for various brands. These utilities allow you to fine-tune analog stick sensitivity and set up custom hotkeys for common tasks like rotating furniture. Configuring these parameters helps you maintain quick control over every aspect of your virtual neighborhood.
Tips for Successful Live Mode Navigation
Transitioning from a keyboard to a handheld layout requires adjusting your physical reflexes, especially when managing multiple family members at once. Using the d-pad to cycle through active speed options is often much faster than clicking on the interface manually. Taking the time to memorize your custom layout will prevent accidental actions during critical life events.
Furthermore, building elaborate mansions becomes surprisingly intuitive once you master the shoulder button configurations for altering wall heights. Combining smooth analog camera panning with precise grid placements offers a fresh perspective on architectural design. Embracing these alternative tools can breathe entirely new life into your daily simulation routines.

Devil May Cry 1 Cheat Codes And Unlockable...
Navigating the gothic and dark atmosphere of the original Devil May Cry can be a challenging endeavor for both newcomers and veteran players alike. Released in 2001, this genre-defining action game introduced players to Dante, an effortlessly badass demon slayer with exceptional combat abilities. While mastering the core gameplay mechanics offers a deeply rewarding experience, utilizing hidden features can significantly alter your journey through Mallet Island.
Unlocking Extra Gameplay Modes
Completing the initial campaign on the normal setting is only the beginning of what this classic title has to offer. Successfully finishing the game unlocks Hard mode, which drastically increases enemy durability and damage output. Defeating this tougher variant subsequently grants access to the legendary Dante Must Die mode, widely regarded as the ultimate test of combat proficiency.
For players who manage to conquer the absolute hardest difficulties, unique character rewards become available. Beating Dante Must Die mode rewards you with the Super Dante costume, giving the player an infinite Devil Trigger gauge. This specialized unlockable allows you to maintain your powerful demonic form indefinitely during combat encounters.
Discovering Hidden Outfits and Characters
Beyond standard upgrades, players can alter Dante's cosmetic appearance and gameplay style by meeting specific completion parameters. Completing the main story on Hard difficulty rewards players with the Legendary Dark Knight costume. This outfit changes Dante's appearance to resemble his father, the legendary demon swordsman Sparda.
Playing as the Legendary Dark Knight modifies more than just your visual presentation during active missions. This special skin changes the appearance of Dante's signature sword and alters the visual effects of certain magical standard moves. It provides an excellent incentive for completionists looking to experience the narrative from a fresh perspective.
Mastering Hidden Mission Content
Tackling the primary narrative path only reveals a portion of the challenges scattered throughout the sinister castle grounds. The game features twelve hidden secret missions that require careful environmental exploration to locate. Finding these optional tasks frequently rewards players with Blue Orb fragments to increase their maximum health pool.
Many players utilize a comprehensive digital tracker to ensure they do not miss these elusive secret triggers during their initial playthroughs. If you want to expand your combat options further, you can explore specialized tools online to manage your progress efficiently. Unlocking every secret mission is entirely necessary for achieving the coveted S-rank status on your overall file.
Legacy Button Combinations and Mechanics
Unlike modern titles that rely on extensive menus, the original PlayStation 2 version relied on precise controller inputs to reveal special options. While standard cheat codes that instantly max out resources are absent, specific button combinations can bypass structural restrictions on certain regional discs. Holding down the shoulder buttons during the title screen can sometimes reset default configurations.
Ultimately, relying on pure mechanical skill remains the most reliable path to mastering this challenging action masterpiece. The developers focused heavily on rewarding player growth, smart timing, and complex combo strings over simple shortcuts. Preparing your strategies in advance ensures a fantastic experience from the opening cinematic to the final boss battle.

Witcher 3 Return To Crookback Bog Quest Choices...
The Witcher 3 Wild Hunt is celebrated for its morally complex narrative, where choices rarely result in a traditionally happy ending. Among the most harrowing segments of Geralt of Rivia's journey is the conclusion to the Velen storyline, which culminates in a tense march back to the swamps. Players must confront the grim realities of dark magic, family trauma, and ancient entities that demand a terrible price for their cooperation.
The Catalyst of the Whispering Hillock
Before players officially trigger the return to the bog, they must resolve the fate of a trapped spirit beneath a nearby tree. This initial encounter serves as the foundational pivot point for the entire regional narrative arc. Tricking or destroying the spirit aligns your efforts with the desires of the malevolent Crones, who control the local populace through fear. Conversely, freeing the entity introduces a chaotic wild card into the Velen ecosystem that reshapes the subsequent investigation.
Navigating these murky political waters requires a deep understanding of the local lore hidden throughout the swamp villages. Players often find that immediate acts of mercy lead to unintended devastation in surrounding settlements. Balancing these competing factions tests your individual definition of the lesser evil during a time of brutal wartime occupation.
Sparing the Spirit and the Orphan Fate
Choosing to liberate the entity trapped inside the hillock leads to a sequence of events that prioritizes the lives of the young. The freed spirit honors its agreement by safely relocating the missing swamp children away from their captors. However, this act of salvation directly enrages the Crones, who exact their immediate vengeance on their caretaker, Anna Stenger. She is transformed into a grotesque water hag, plunging her estranged family into deep emotional despair.
When Geralt and the Bloody Baron arrive during the final assault, they are forced to witness the devastating toll of this supernatural curse. Even if you manage to lift the physical affliction, the psychological damage remains permanently fatal to her well-being. This path ultimately drives the grieving Baron to end his own life, leaving the local garrison under the rule of a volatile lieutenant.
Destroying the Entity and Saving Downwarren
If Geralt decides to eliminate the spirit beneath the tree, the immediate narrative consequences shift toward protecting the local adult population. The village of Downwarren remains safe from supernatural destruction, ensuring the survival of numerous local families. Unfortunately, this choice leaves the swamp orphans completely defenseless against the cruel appetites of the forest ladies. Anna survives the encounter without being transformed into a monster, though the trauma leaves her mind completely fractured.
This resolution allows the Baron to take his ailing wife away to a distant healer in search of a potential cure. While this offers a small glimmer of domestic hope, it comes at the direct expense of innocent young lives. The game masterfully avoids vindicating either option, leaving players to contemplate the heavy cost of their decisions long after the contract is officially completed.

How To Get Wings In Terraria
Acquiring total vertical mobility changes the pace of exploration entirely when you transition into the challenging stages of your adventure. Wings function as an essential Hardmode accessory that allows players to fly effortlessly, negate fall damage completely, and dodge aggressive boss attacks with precision. Securing your first set of wings requires a solid understanding of crafting recipes and environmental progression landmarks.
Defeating the Wall of Flesh to Unlock Hardmode
Before you can obtain standard wings, you must successfully defeat the final boss of the Underworld to unlock your world's Hardmode phase. This dramatic transition introduces completely new enemies, tougher biomes, and unique item drops across the entire map. Once Hardmode is activated, the materials needed to craft high-tier movement accessories will naturally start appearing during your travels.
It is important to prepare your active character gear thoroughly before initiating this permanent environmental shift. Collecting robust defensive armor sets and assembling long platforms across the lava pools will make the initial boss encounter much easier to manage. Transitioning early gives you immediate access to basic aerial upgrades scattered throughout the sky.
Gathering Flight Souls from the Sky Biome
The definitive key to crafting most regular wings involves hunting down powerful creatures located high above the clouds. Wyverns are formidable, snake-like enemies that frequently spawn in the Space layer once your world enters its advanced stage. Defeating these aggressive sky beasts rewards you with Souls of Flight, which serve as a mandatory ingredient for multiple accessory blueprints.
Setting up a safe platform near a floating island allows you to farm these rare essences with maximum efficiency. Utilizing long-range piercing weaponry or magical projectile spells helps mitigate the rapid charging movements of the Wyverns. Once you secure enough souls, you can combine them with various localized materials at a mythril or orichalcum anvil.
Buying Early Wings from Village Vendors
If you prefer to bypass the intense combat requirements of farming sky enemies, certain residents offer direct purchasing options under specific conditions. The Witch Doctor will sell Leaf Wings immediately if his housing layout is located directly inside the Jungle biome during the night cycle. This strategy provides an exceptional alternative for players looking to skip early crafting grinds entirely.
Securing the necessary amount of platinum coins requires managing your town economy efficiently through trading and selling valuable gems. Purchasing gear from these unique merchants saves immense travel time and offers excellent initial stats for early Hardmode survival. Balancing your funds with vendor happiness metrics ensures you get the best deal available.
Slaying Rare Monsters for Special Material Drops
Advanced wings often demand highly specific components that only drop from rare environmental encounters or unique seasonal events. For instance, defeating giant moths during a Solar Eclipse event gives players a chance to obtain broken butterfly wings. Similarly, exploring the dangerous underground ice biomes can yield frozen feathers from formidable ice golems.
Combining these specialized monster drops with your gathered souls unlocks unique cosmetic appearances and enhanced flight durations. Experimenting with different material combinations ensures your character remains agile enough to handle endgame threats. Prioritizing these targeted hunting routes will eventually reward you with absolute mastery over the skies.

Arkham Knight Line Of Duty Complete Mission And...
Confronting the chaotic open-world challenges in Batman: Arkham Knight requires players to balance the main narrative alongside numerous detailed side activities scattered throughout Gotham City. One of the most compelling early-game assignments is The Line of Duty Most Wanted mission, which tasks the Dark Knight with tracking down missing crew members from Station 17. Successfully finding these trapped individuals not only unlocks crucial upgrades but also brings you closer to the true completion of Gotham's dramatic campaign.
Initiating the Hunt on Bleake Island
The rescue mission officially begins during the early stages of the main story right after you escort Poison Ivy to the Gotham City Police Department. Bleake Island holds the initial set of missing crew members who are being held captive by aggressive street thugs. Players need to carefully scan rooftops and secluded shipyards near the docks to locate these early encounters.
As you glide through the dark skies, paying close attention to distant shouting or unusual thug gatherings will guide you directly to the targets. Defeating the captors around places like the Chinatown alleyways or the crane structures near Falcone Shipping secures the safety of the initial victims. These early rescues are essential for generating the momentum needed to locate the remaining targets across the city channels.
Expanding the Rescue Effort to Miagani Island
Once you gain full access to the southern districts, the search area expands across the towering skyscrapers and industrial zones of Miagani Island. The remaining crew members here are surrounded by larger, more dangerous enemy groups that often utilize shields or firearms. Approaching these encounter locations with a solid stealth strategy allows you to thin out the enemy ranks before engaging in direct combat.
Key locations to investigate include the lower platforms beneath the Grand Avenue rail tracks and the shadows of the Elliot Memorial Hospital. You can check the current status of your missing persons list by accessing the dedicated Most Wanted menu in your system interface at any time. Rescuing the crew members trapped near the botanical gardens ensures the operational continuity of your overarching investigative project.
Securing the Final Targets on Founders Island
Founders Island presents the highest tactical difficulty for players due to the presence of heavily armed drone patrols and elite soldier archetypes. The missing personnel in this sector are hidden away in complex architectural spaces, such as deep construction sites and abandoned shipping yards. Utilizing the Batmobile's heavy weaponry is often necessary to clear the initial perimeter blockades before searching on foot.
Look closely near the structural foundations of Ryker Heights and the secluded piers of Port Adams to find the final remaining groups. Each successful intervention rewards the player with valuable WayneTech upgrade points to boost combat efficiency. Overcoming these heavily fortified positions is the final step before confronting the mastermind behind the widespread disappearances.
Confronting the Chief and Completing the Assignment
After successfully securing all fifteen missing crew members across the three islands, the final location of Chief Underhill will be uploaded to your map grid. This climactic encounter takes place inside a highly guarded facility where you must deploy advanced gadgets to bypass active security measures. Sabotaging the enemy infrastructure allows you to safely extract the leader and put a permanent end to the crisis.
Returning the rescued chief to the GCPD lockup officially concludes the mission sequence and secures your progression rewards. Completing this assignment provides excellent narrative context while building toward the ultimate Knightfall endgame requirement. Managing these rescues efficiently ensures that Gotham's emergency services are fully restored amid the ongoing citywide siege.

Lego Batman The Videogame Codes And Cheat Guide
Lego Batman The Videogame remains a cherished classic that perfectly blends the dark atmosphere of Gotham City with the signature humor of Traveller Tales brick-based adventures. Players can explore extensive hero and villain campaigns, but unlocking every hidden character and vehicle organically requires a massive commitment of time. Utilizing built-in passwords provides a reliable shortcut to expand your roster and enhance your overall gameplay experience efficiently.
How to Access the Batcomputer Input Terminal
Before you can begin activating various enhancements, you must navigate to the main hub area within the game. Both the Batcave and Arkham Asylum house a specialized terminal known as the Batcomputer where alphanumeric sequences can be entered. Accessing this computer opens up a grid interface designed specifically for inputting hidden passwords.
Once you interact with the screen, you will be prompted to type in specific six-character combinations. Successfully entering a valid sequence immediately unlocks the corresponding reward without consuming your hard-earned studs. This system allows completionists to easily bypass early progression hurdles and jump straight into free play experimentation.
Unlocking Iconic Heroes and Villains
The software features a massive roster of comic book personalities that completely changes how you interact with the environment. By inputting the proper designations, you can instantly recruit powerful allies like Nightwing or dangerous adversaries like the Joker and Harley Quinn. Having early access to these characters simplifies the process of revisiting previous stages to gather hidden minikits.
Many of these characters possess unique traversal mechanics and combat abilities that are mandatory for achieving a perfect completion score. For instance, using specialized villain abilities allows you to bypass toxic hazards or manipulate specific machinery that Batman cannot interact with normally. Expanding your digital collection early transforms standard mission replays into highly efficient resource hunts.
Activating Powerful Extras and Multipliers
Beyond expanding your character roster, utilizing these shortcuts can grant access to game-altering modifications found within the extras menu. Players can activate helpful mechanics such as stud multipliers, score magnets, and invincibility to drastically minimize the time spent grinding. These tactical enhancements ensure your caped crusader remains completely safe during intense boss encounters.
Implementing these gameplay modifiers does not deactivate your ability to earn standard rewards or complete the main storyline achievements. It simply offers a customizable sandbox environment where you can enjoy the narrative at your own preferred pace. Experienced players frequently recommend activating the score multipliers first to maximize your purchasing power throughout the campaign.
Maximizing Your Free Play Strategy
Achieving a perfect status in this classic action-adventure title relies heavily on how effectively you utilize your unlocked assets in the free play mode. Once the primary restrictions are removed, you can seamlessly swap between heroes and villains to solve complex environmental puzzles. This tactical freedom ensures that no hidden collectible remains out of your reach during secondary runs.
By organizing your exploration around the unique traits of your expanded roster, you can clear out entire districts with minimal backtracking. Balancing raw physical power with specialized technical skills is the definitive key to mastering every corner of Gotham. Ultimately, blending these classic strategies with built-in shortcuts provides the ultimate rewarding experience for fans of all ages.

Best Commander Precons Of All Time Powerful Decks...
Magic the Gathering has seen an incredible evolution in its preconstructed multiplayer products over the last decade. Finding the perfect entry point or upgrade candidate can be challenging given the sheer volume of yearly releases. Fortunately, certain ready-to-play options stand out by offering immense value, coherent synergies, and high power right out of the box.
The Value of Strong Foundations
Preconstructed decks serve as an essential bridge for players entering the format without a massive personal collection. The finest examples provide highly resilient mana bases and robust engines that remain competitive even against heavily customized builds. Investing in these well-engineered products ensures that newcomers can immediately enjoy the tactical depth of multiplayer games.
Experienced players often look at these releases as premium foundations for optimization and custom brewing. The inclusion of exclusive mechanics and highly sought-after reprints makes specific releases incredibly attractive from a financial perspective. A well-constructed product preserves its appeal by operating smoothly under various gameplay conditions.
Icons of Unrivaled Synergy
Certain tribal and engine-driven builds have earned legendary status within the community due to their relentless battlefield presence. Decks featuring dedicated themes like the Necrons or Elves showcase how optimized a single-color or dual-color strategy can truly become. These lists utilize specialized synergies that allow players to rebuild their boards rapidly after devastating clear spells.
Another phenomenal standout is the Veloci-Ramp-Tor build, which leverages massive creature threats alongside highly efficient resource acceleration. Decks like these show how modern design philosophies have elevated the baseline performance of preconstructed products. The strategic cohesion present in these options provides an incredibly satisfying experience for players of all skill levels.
Navigating the Evolving Meta
As the multiplayer ecosystem changes, players frequently adjust their approaches to deck selection and optimization. Finding reliable resources and participating in format discussions can significantly enhance your understanding of complex card interactions. Many enthusiasts enjoy exploring community forums to share unique strategies and discover fresh upgrade paths for their favorite lists.
When looking to expand your knowledge or discover alternative casual formats, finding dedicated player hubs can be highly beneficial. If you want to connect with other fans, you can visit a community platform to exchange ideas and find new playgroups. Engaging with the broader community helps ensure that your deck choices align perfectly with your local gameplay expectations.
Long Term Replayability and Growth
The ultimate test of a preconstructed product is how well it holds up after dozens of gameplay sessions. The top-tier choices feature branching paths and alternative commanders that completely alter the operational strategy of the deck. This built-in variety ensures that the gameplay experience remains fresh and engaging over extended periods.
Ultimately, the best ready-made options balance accessibility with a high skill ceiling to satisfy everyone at the table. They provide an immediate sense of power while leaving ample creative room for personal touches and customization down the road. Selecting a historically strong deck guarantees a rewarding investment that will remain relevant for years to come.

Streets Of Rage 3 Cheats Complete Cheat Code...
Mastering the gritty, neon-lit combat in Streets of Rage 3 often demands an extra layer of strategy due to its famously elevated difficulty levels. While the classic Sega Genesis beat 'em up introduced complex mechanics like rolling and vertical dodging, players frequently look for hidden options to tilt the scales in their favor. Utilizing the built-in developer shortcuts allows enthusiasts to unlock secret fighters, adjust their starting resources, and experience the narrative with complete control.
Accessing the Hidden Options Menu
Reaching the secret configuration screen represents the first crucial step for players looking to customize their gameplay experience. To access this menu, hold down the B button on the second controller while navigating to the options screen on the primary controller. Successfully executing this button combination expands your settings, allowing you to select up to nine starting lives instead of the standard limitation.
Furthermore, this advanced configuration lets you select individual stages to practice difficult boss encounters or view specific branching storylines. Adjusting these parameters provides a magnificent way for newcomers to learn enemy patterns without constantly facing a game over screen. Veteran players also utilize this method to rapidly test new combat combinations across late-game environments.
Unlocking Secret Playable Characters
Expanding your roster beyond Axel, Blaze, Skate, and Zan introduces unique combat dynamics that completely alter the flow of battle. To unlock Roo the Kangaroo, you must refrain from defeating him during the Stage 2 boss encounter and focus entirely on his handler, Bruce. Once Bruce is neutralized, Roo will escape the area and become immediately available as a selectable fighter when utilizing your next continue.
Alternatively, players can unlock Shiva, the highly skilled martial artist, by using a precise controller command immediately after his defeat in Stage 1. Hold down the B button until the next section transitions to ensure he joins your character select pool for the remainder of the campaign. Discovering how to effectively expands your tactical approach, giving you access to faster movement rates and devastating close-range techniques.
Activating Stage Select and Level Select Prompts
Navigating the complex multi-path narrative requires a solid understanding of how to trigger specific level select commands from the main screen. At the main menu, players can input a precise sequence of directional inputs on the D-pad alongside the face buttons to choose their starting destination. This capability is exceptionally useful for viewing the multiple distinct endings built into this classic title.
Each sequence must be entered rapidly before the game introductory music finishes to ensure the registration functions properly. Mastering these inputs grants immediate entry to the final fortress or the hidden corporate boardrooms without enduring the grueling previous stages. This tactical freedom keeps the classic side-scroller highly replayable for modern audiences seeking retro challenges.

Arc Raiders Supply Drop Locations Best Farming Spots...
Arc Raiders introduces players to a dangerous sandbox environment where gathering rare resources determines your survival and upgrade progression. Securing high-tier equipment often requires locating specific cache arrivals scattered across the desolate landscape. Understanding the precise deployment zones and timing mechanics allows squads to maximize their inventory efficiency during intense extractions.
The Value of Strategic Drop Sites
Supply arrivals contain crucial blueprints and synthetic materials that are essential for upgrading tools at the workshop. These high-value locations naturally attract hostile squads and rogue machines looking to intercept valuable assets. Securing these zones demands careful tactical planning and rapid crowd-control measures before rival mercenaries descend on your position.
Surviving these contested areas requires a solid understanding of team synergy and defensive positioning. Teams that establish clear lines of sight can easily repel incoming raiders while unlocking the containers safely. Prioritizing these localized events provides the fastest route to acquiring endgame components and trading commodities.
Top Farming Spots and High Tier Zones
The industrial ruins located in the central valley feature dense clusters of automated mechanical activity and regular cargo deployments. This region offers numerous choke points that clever squads can utilize to set traps for unsuspecting opponents. The high density of structures ensures ample cover while waiting for the next deployment countdown to trigger.
Another excellent location for gatherers is the forgotten radar complex situated near the northern ridge line. This vantage point allows players to spot approaching threats early while clearing out smaller mechanical units. Navigating this elevated terrain grants a massive defensive advantage against aggressive teams attempting to steal your hard-earned loot.
Maximizing Extraction and Team Survival
Managing your inventory weight while locking down a cargo arrival is critical for successful extractions. Players should always coordinate their active skill cooldowns to counter sudden reinforcements from elite mechanical guards. Utilizing smoke grenades or deployable shields can provide the necessary breathing room during chaotic extractions.
Before committing to a long engagement, ensure your squad has identified the closest available exit route. Having a backup plan mitigates the risk of losing valuable resources to third-party ambushes. Consistency in execution transforms high-risk extraction runs into predictable wealth generation cycles.

Rise Of The Tomb Raider Challenges Guide
Rise of the Tomb Raider challenges players to explore harsh frozen landscapes while testing their observational skills through optional environmental tasks. Completing these challenges is essential for achieving full game completion and earning extra experience points to upgrade Lara Croft's survival skills. This comprehensive overview highlights the strategies required to conquer the trickiest regions in the game.
Mastering the Syrian and Siberian Regions
The early segments of the game introduce players to basic exploration mechanics through relatively straightforward tasks. In Syria, players need to pinpoint hidden incense burners suspended from ancient temple ceilings to complete the Hang 'Em High objective. Exploring these initial zones carefully ensures that players gain early advantages before arriving in the unforgiving Siberian environments.
Once Lara arrives in the frozen wilderness, the difficulty increases as she must navigate deep snowfields and hunt territorial wildlife. The Grab and Go challenge requires players to loot a specific number of enemy corpses scattered throughout the starting campsite. Staying alert during combat allows you to efficiently gather these resources without backtracking later.
Conquering the Geothermal Valley Tasks
The Geothermal Valley acts as a massive hub area containing an abundant variety of complex environmental objectives. Players will spend considerable time tracking down hidden chickens to toss into a coop for the Fowl Play assignment. This task requires careful pathfinding around the village structures to find every stray bird.
Another notable task in this lush valley involves diving off high platforms into deep pools of water scattered near waterfalls. Perfecting the swan dive mechanic is crucial to ensuring each leap registers correctly for the High Dive objective. Methodically checking elevated cliffs will reveal the wooden platforms built for these challenging drops.
Navigating the Soviet Installation Objectives
The sprawling Soviet Installation zone presents unique structural challenges, requiring Lara to climb massive rusted industrial complexes. In the Data Corruption objective, players must find and destroy isolated red laptops tucked away inside secure office buildings. Missing a single terminal can stall your completion progress, so thoroughly scanning every room is highly recommended.
Additionally, the Difference of Opinion challenge requires players to burn propaganda posters hung high on concrete walls. Utilizing fire arrows or oil lanterns found nearby is the most efficient way to clear these targets from a safe distance. Keeping an eye on vertical structures will help you spot these well-hidden collectibles easily.

Should You Free Orpheus In BG3
Baldurs Gate 3 presents players with numerous difficult moral dilemmas, but few match the narrative weight of deciding the fate of the imprisoned Githyanki prince. As you approach the absolute climax of Larian Studios epic role-playing game, you must choose between supporting your longtime mind flayer ally or breaking the bonds of the captive savior. This monumental choice radically alters the final hours of your journey and reshapes the political landscape of the Forgotten Realms forever.
The Immediate Consequences of Freedom
Choosing to shatter the chains holding the Githyanki prince requires you to acquire the Orphic Hammer from the House of Hope. The second you decide to free the captive royalty, your long-standing protector, the Emperor, will immediately deem you a threat and defect to the side of the Netherbrain. This dramatic shift means you will lose a major strategic ally and must prepare to face him in the final battle.
Furthermore, defeating the ultimate threat still requires the unique capabilities of an illithid mind. If you choose this path, either your main character, Orpheus himself, or Karlach must sacrifice their humanity to transform into a mind flayer. This heartbreaking tactical requirement ensures that even a righteous path towards liberation demands a heavy personal toll from your adventuring party.
Siding With the Emperor Instead
If you decide to leave the prince to his grim fate, the Emperor will consume his brain to absorb the unique psionic protection needed for the final assault. This decision guarantees the absolute loyalty of your mind flayer guardian, streamline your final push toward the Netherbrain without unexpected betrayals. It represents a pragmatic approach that values survival and certainty above idealistic rebellion.
However, this path comes with severe emotional consequences, especially regarding your companion companionships. Allowing the Emperor to execute the prince will deeply devastate Lae-zel, potentially forcing you to pass difficult persuasion checks to keep her from turning hostile. For many players, sacrificing the future of an entire civilization feels like an irredeemable narrative betrayal.
Impact on the Githyanki Civil War
From a long-term storytelling perspective, liberating the true heir completely alters the destiny of the Githyanki people. With his freedom secured, the prince can actively lead a grand revolution against the tyrannical rule of the lich-queen Vlaakith. This outcome provides a hopeful, heroic resolution for Lae-zel's personal quest line as she fights alongside her true leader.
Conversely, leaving the prince to perish cements Vlaakith's absolute control over her fanatical empire, leaving countless generations trapped under her deceptive rule. While your party might successfully save Baldurs Gate, the broader universe suffers a major narrative loss. Ultimately, the decision relies heavily on whether you prioritize immediate tactical safety or the long-term freedom of an alien society.

Strategic Solutions to Difficult Challenges
Modern professional environments frequently present complex obstacles that require more than just standard troubleshooting methods to resolve. Navigating these high-pressure scenarios successfully demands a sophisticated combination of analytical thinking and long-term foresight. By implementing structured tactical frameworks, organizations can transform seemingly insurmountable roadblocks into clear opportunities for growth.
Analyzing the Root Cause
Every effective problem-solving strategy begins with a thorough investigation into the underlying causes of an operational crisis. Breaking down large corporate issues into smaller, manageable components allows teams to identify the exact source of systemic failures. This precise diagnostics process ensures that valuable corporate assets are not wasted on temporary or superficial fixes.
Furthermore, cultivating deep analytical intuition helps decision-makers anticipate potential disruptions before they fully manifest. Teams that rely heavily on real-time data analysis consistently outperform those that operate purely on reactive instincts. Evaluating historical patterns provides the objective clarity needed to navigate unpredictable industry shifts safely.
Developing Actionable Frameworks
Once the core issues are clearly identified, leaders must design adaptive strategies tailored to their specific operational boundaries. Establishing fluid workflows ensures that personal and collaborative efforts remain perfectly aligned under intense pressure. This structured adaptability allows organizations to pivot efficiently when unexpected market variables emerge.
Maintaining clear communication channels across all organizational levels heavily influences the overall success of a new strategy. When every team member understands their precise tactical priorities, execution becomes significantly more cohesive. Dedicated managers often study advanced operational platforms like M88 Bet to observe how high-level tactical coordination functions in competitive environments.
Prioritizing Workload and Resources
Behind every successful solution lies a balanced framework for allocating limited operational assets effectively. Streamlining task management by utilizing a strict prioritization matrix helps reduce workplace stress while maximizing human efficiency. Experienced coordinators always protect long-term economic stability over brief, high-risk advantages that might jeopardize future projects.
Perfecting this logistical balance prevents resource depletion during the most demanding phases of a crisis recovery campaign. Running multiple production lines simultaneously requires constant vigilance and realistic scheduling constraints. Choosing what to delay is often just as critical as choosing which tasks to accelerate immediately.
Building Long-Term Resilience
Ultimately, mastering complex professional challenges comes down to continuous deliberate practice and thorough post-performance evaluation. Reviewing past strategic errors highlights critical areas that require immediate operational adjustments before the next major undertaking. Over time, this consistent habit builds a highly resilient workforce capable of enduring prolonged industry difficulties.
Every operational setback offers an invaluable learning opportunity that sharpens future planning capabilities and tactical awareness. Embracing an institutional growth mindset transforms stressful experiences into powerful lessons for subsequent business cycles. Through persistence and disciplined execution, any dedicated team can achieve sustained excellence despite facing formidable challenges.
Fostering an Innovation Mindset
True operational resilience requires a culture that actively encourages creative thinking and calculated risk acceptance. When employees feel empowered to propose unconventional solutions, organizations discover unique pathways to overcome stagnant growth. Embracing diverse cognitive perspectives often unlocks the exact breakthrough needed to resolve prolonged structural deadlocks.
Moreover, celebrating small incremental victories along the way keeps team morale high during extended periods of hardship. Recognizing individual contributions reinforces the collective dedication required to execute long-term strategic transformations. Ultimately, a forward-thinking workplace culture serves as the strongest shield against future market disruptions.